This entry is an update on growing techniques for raising edible gourmet mushrooms in the backyard garden. I’ve written previously about starting mushrooms outdoors on logs, indoors using mushroom kits, and have also posted a video showing how to inoculate a log with spawn, but today I have some new tips and information to share.
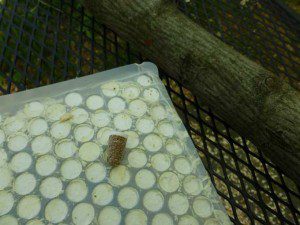
I get frequent inquiries asking about how the previous mushroom inoculations are doing so I will begin there. I started about twenty logs during the spring of 2012 using shiitake and oyster mushroom species on thimble spawn. The thimble spawn consists of compressed sawdust spawn in a thimble shape with a Styrofoam cap.
An Update on the Backyard Mushroom Log Production
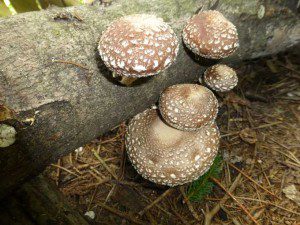
 This group of mushroom logs came into full production last summer and fall and have yielded a great crop, especially the shiitakes. I did not weigh the harvest but the logs have been covered from end to end with larger sized shrooms during the summer and smaller, but maybe even better quality mushrooms now that the weather has cooled down.
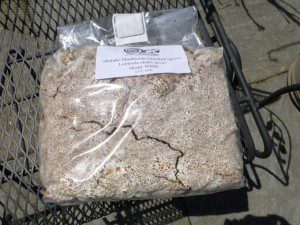
I inoculated a second group of logs this past spring and this time I used a pure sawdust spawn that requires a special inoculation tool but has become my favorite method to start the logs (more on that later). This time around I used only shiitake spawn to inoculate the logs, but I did use strains that are more prolific at different temperatures from the earlier strains that I started in order to lengthen the fruiting periods.
I was surprised to notice some signs of mushroom fruiting from this last group, even though they had only been inoculated about five months prior. It was just a mushroom or two here and there, but that was still encouraging and raised my expectations for what production will be like next spring.
Various Techniques for Inoculating Gourmet Mushroom Logs
Up to now I have tried several different techniques to inoculate mushroom logs using; plug spawn, thimble spawn, and sawdust  spawn. Each method was pretty easy and resulted in successful inoculations of the mushroom mycelium but I have come to note some advantages and disadvantages and have developed my own preferences.
The plug spawn consists of a small, grooved, wooden dowel that has mycelium growing on it, these plugs are simply hammered into the holes drilled into the hardwood logs, sealed with wax, and allowed to permeate the log with the mycelium. This was the first technique that I tried and is probably the simplest technique and one that requires no special equipment, but it can take the longest time so see results.
Next I experimented with the thimble spawn which is sawdust spawn compressed into a thimble shape with a Styrofoam cap on the end. The caps retain moisture and eliminate the need for wax to seal the logs with. This method was easy but I found it more difficult to insert the thimbles than it was to set the wooden plug spawn in place, and I did have issues with the caps becoming dislodged shortly after inoculating the logs. I had no complaints about the results though, and so far the thimble spawn has yielded some of the best mushroom harvests that I have experienced.
Switching Over to Sawdust Spawn for Cultivating Mushrooms
 Using sawdust spawn might be considered as more of an advanced inoculation technique because some specialized equipment is required; specifically a tool that is used to pack and punch the sawdust into the holes that are drilled into the hardwood logs. Other than that this method is just as straight forward and easy as the others are.
This sawdust spawn technique has become my favorite inoculation method because it is economical, efficient, and may prove to be more effective based on how quickly I have begun seeing results. I plan to continue using sawdust spawn from here on out but would not hesitate to recommend the plugs as well, especially for someone trying to inoculate a batch of logs for the very first time.
I will follow up and share how the logs inoculated with the sawdust spawn perform this spring when I should get a better feel for how well they perform in comparison to the thimble or plug spawn that I have used in the past, but so far I am very pleased with this method of inoculating mushrooms even on a small-scale.
A New Member to the Backyard Edible Mushroom Family
This year unveiled the production of a new mushroom variety to my landscape in the form of the Wine Cap Stropharia Mushrooms. This variety is large, attractive, easy to grow, and very delicious! They are also easy to learn to identify and display some unique features that set them apart. As with any wild plant, but even more so with mushrooms you need to ensure a positive identification before consuming them.
I raised my Wine Cap mushrooms from sawdust spawn that was used to inoculate a bed of wood chips. The first fruiting occurred within a year of inoculation. These mushrooms will grow very large but are best harvested and prepared when they are at smaller sizes, which won’t create a problem because they are very productive and appear in large clusters of mushrooms.
Wine Caps can be grown on straw as well as wood chips and it isn’t difficult to find a spot to set up a mushroom bed even if think that  you don’t have space for mushroom logs. This summer I inoculated more wood chips that I also use as a mulch underneath of several dwarf apple trees to see how they will do in that setting. Once the spawn has fruited and exhausted the wood more chips can be added to keep the bed in production during the following seasons.
I find growing gourmet mushrooms in the backyard to be extremely satisfying because it is a natural and simple process that will continue to yield over multiple seasons from a single inoculation. And best of all you will enjoy picking and eating delicious and nutritious gourmet mushrooms without paying exorbitant prices to obtain them.


 Address:
 EMAIL:
 Telephone: